安装部暑
环境
服务器:
- server端:
test11:192.168.37.11 - agent端:
test12:192.168.37.12
系统版本:
- Centos7.6
添加 Zabbix 软件仓库
rpm -ivh http://repo.zabbix.com/zabbix/4.0/rhel/7/x86_64/zabbix-release-4.0-1.el7.noarch.rpm前端安装的先决条件
Zabbix 前端需要额外的基础安装包。 您需要在运行 Zabbix 前端的系统中启用可选 rpms 的软件仓库:
yum-config-manager --enable rhel-7-server-optional-rpms安装 Server/proxy/前端
安装 Zabbix server(适用于 RHEL7,在 RHEL 6 上弃用)并使用 MySQL 数据库:
yum install zabbix-server-mysql -y安装 Zabbix proxy 并使用 MySQL 数据库:
yum install zabbix-proxy-mysql -y安装 Zabbix 前端(适用于 RHEL 7,在 RHEL 6 上弃用)并使用 MySQL 数据库:
yum install zabbix-web-mysql -y创建数据库
安装及启动mysql数据库:
wget -i -c http://dev.mysql.com/get/mysql57-community-release-el7-10.noarch.rpm
yum -y install mysql57-community-release-el7-10.noarch.rpm
yum -y install mysql-community-server
systemctl start  mysqld.service
更改数据库root密码,初始密码登录对数据库不能作任何操作
[root@test11 ~]# grep "password" /var/log/mysqld.log
2019-08-05T08:32:57.466257Z 1 [Note] A temporary password is generated for root@localhost: h+npM!e87o#x
[root@test11 ~]# mysql -uroot -p
Enter password:
mysql> ALTER USER 'root'@'localhost' IDENTIFIED BY 'Admin*1212';
Query OK, 0 rows affected (0.00 sec)
为zabbix创建zabbix库和zabix的访问mysql的用户(这里简单设置用户密码,工作环境设置复杂点):
mysql> create database zabbix character set utf8 collate utf8_bin;
mysql> grant all privileges on zabbix.* to zabbix@localhost identified by 'Admin*1212';
导入数据
使用MySQL来导入Zabbix server的初始数据库 schema 和数据:
[root@test11 ~]# zcat /usr/share/doc/zabbix-server-mysql-4.0.11/create.sql.gz | mysql -uzabbix -p zabbix
Enter password:              #这里刚创建zabbix用户的密码
为 Zabbix server/proxy 配置数据库
# vi /etc/zabbix/zabbix_server.conf
DBHost=localhost
DBName=zabbix
DBUser=zabbix
DBPassword=Admin*1212
关闭seliunx
[root@test11 ~]# setenforce 0
[root@test11 ~]# sed -i s#enforcing#disabled#g /etc/selinux/config
启动zabbix-server
[root@test11 ~]# systemctl start zabbix-serverzabbix前端设置
[root@test11 ~]# vim /etc/httpd/conf.d/zabbix.conf
  <IfModule mod_php5.c>
        php_value max_execution_time 300
        php_value memory_limit 128M
        php_value post_max_size 16M
        php_value upload_max_filesize 2M
        php_value max_input_time 300
        php_value max_input_vars 10000
        php_value always_populate_raw_post_data -1
        # php_value date.timezone Europe/Riga
        php_value date.timezone Asia/Shanghai      #设置正确的时区
    </IfModule>
启动httpd
[root@test11 ~]# systemctl start httpd浏览器中登录zabbix的web界面,按照如下截图设置:http://192.168.37.11/zabbix/setup.php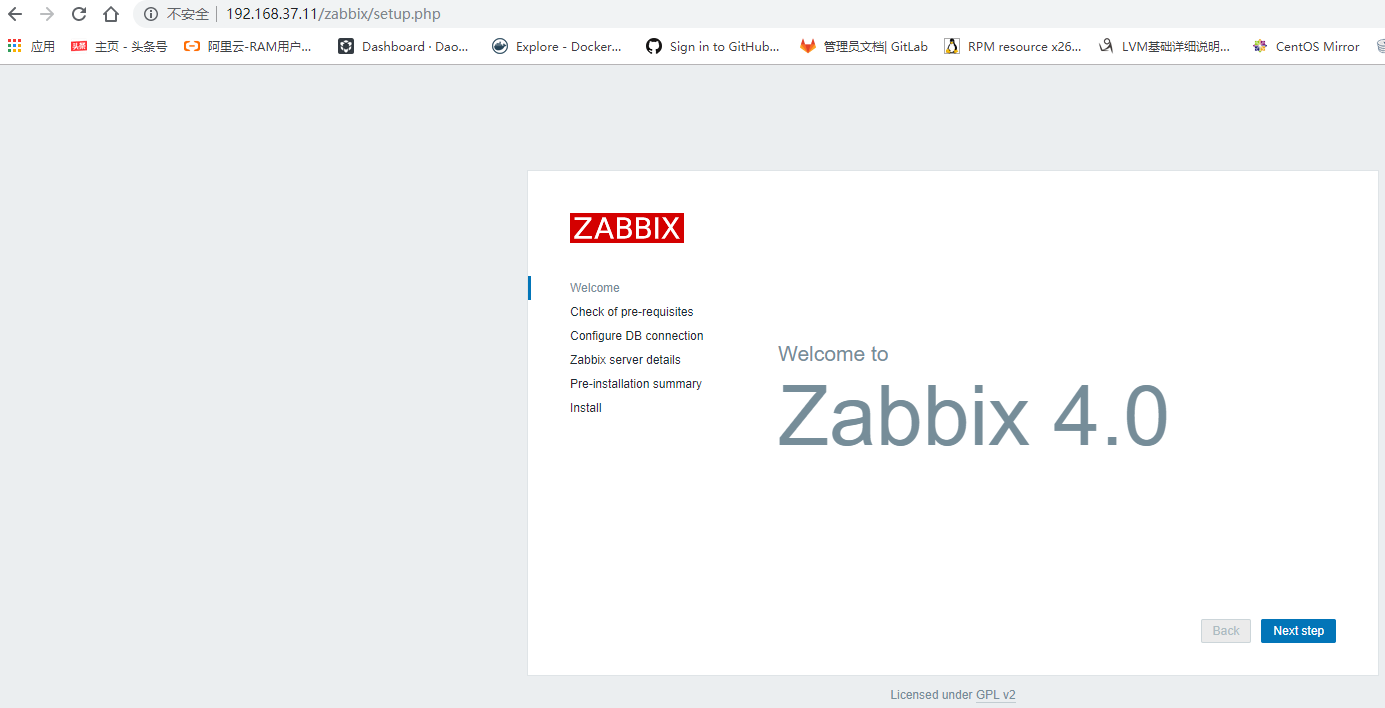
下一步如下截图,如果有截图中列表有不通过的根据提示处理: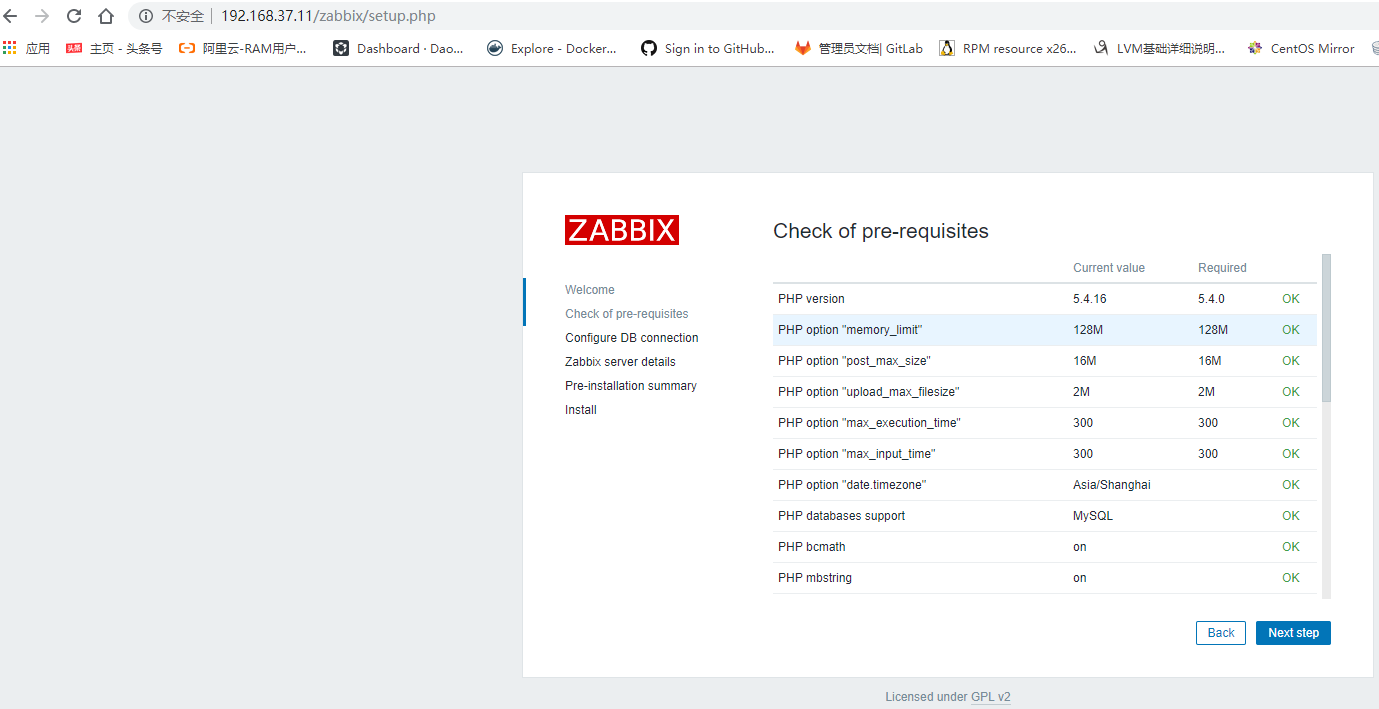
配置数据库,如果数据库是其它远程服务器的请输入数据库所在服务器的ip地址:
输入zabbix的web界面的名称,这是个可选参数,不输入的采用默认名称: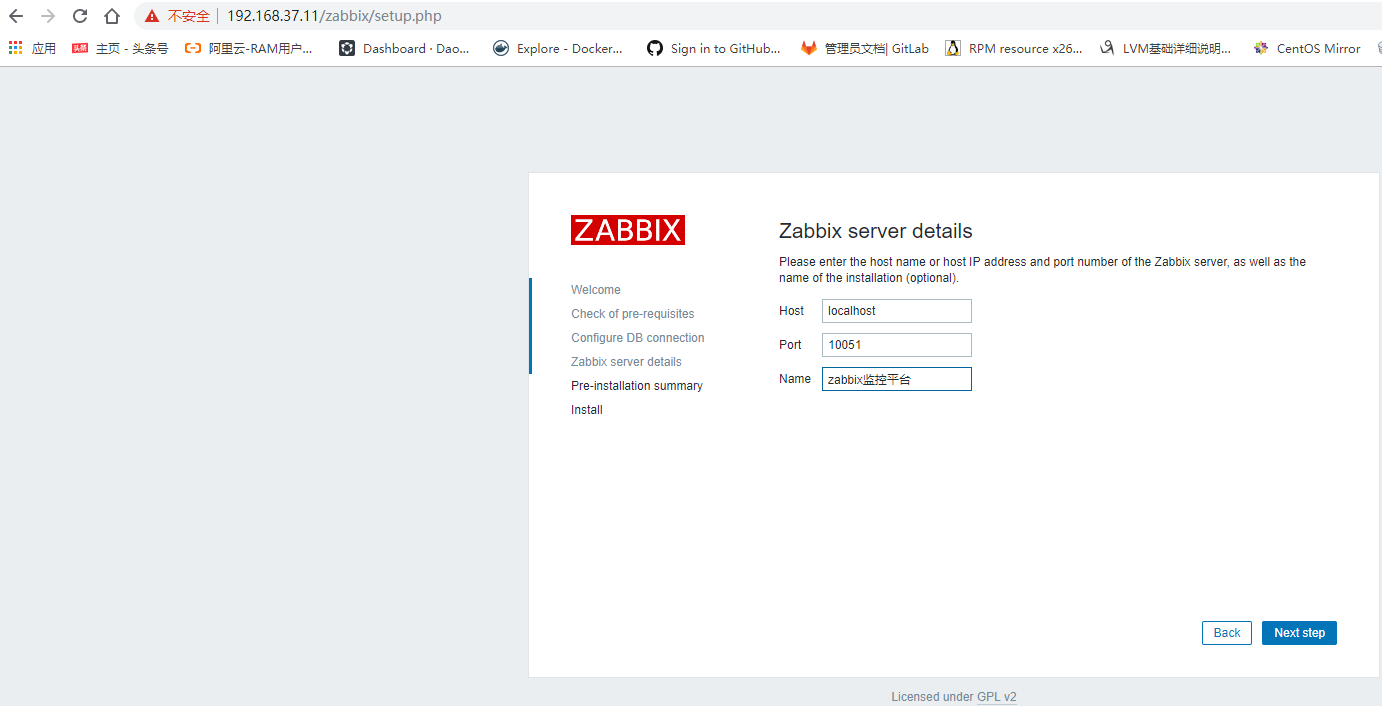
再点击下一步,开始初始化zabbix的web监控平台: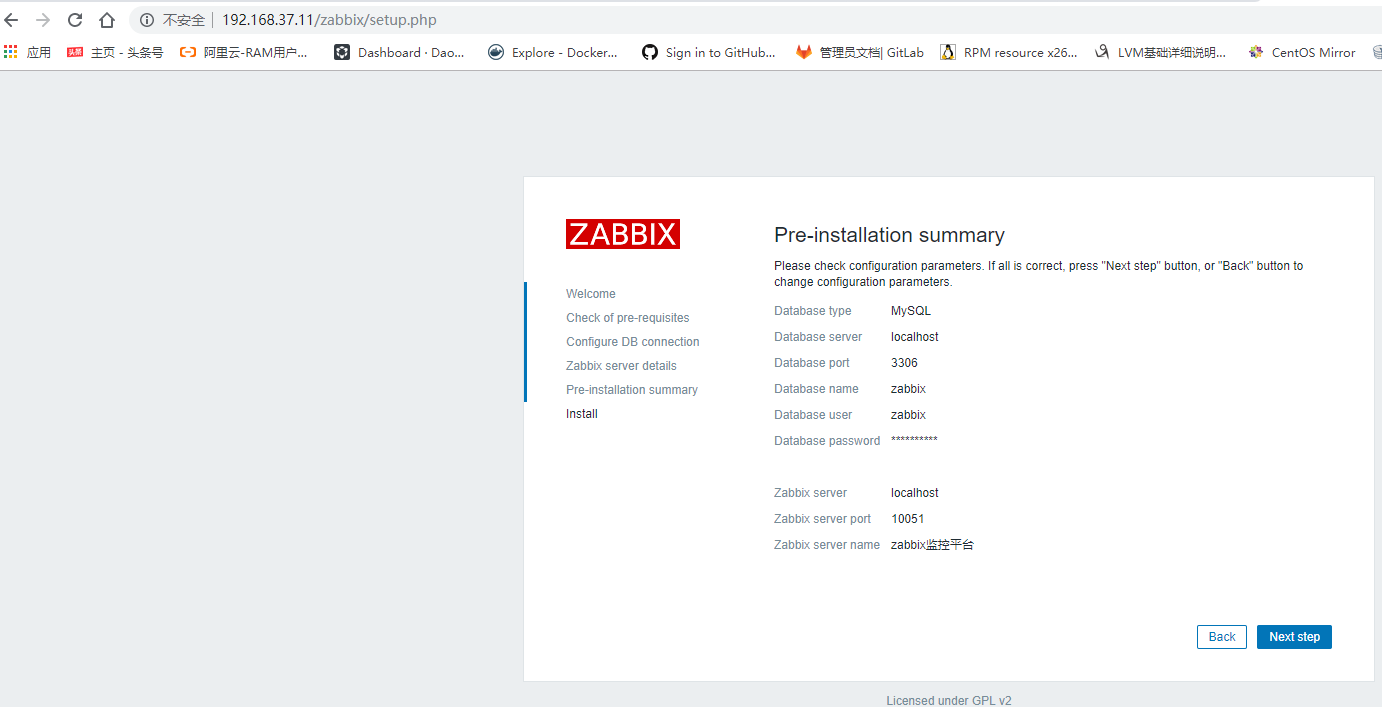
登录web监控平台,默认用户名,密码为:Admin zabbix ,登录后界面如下: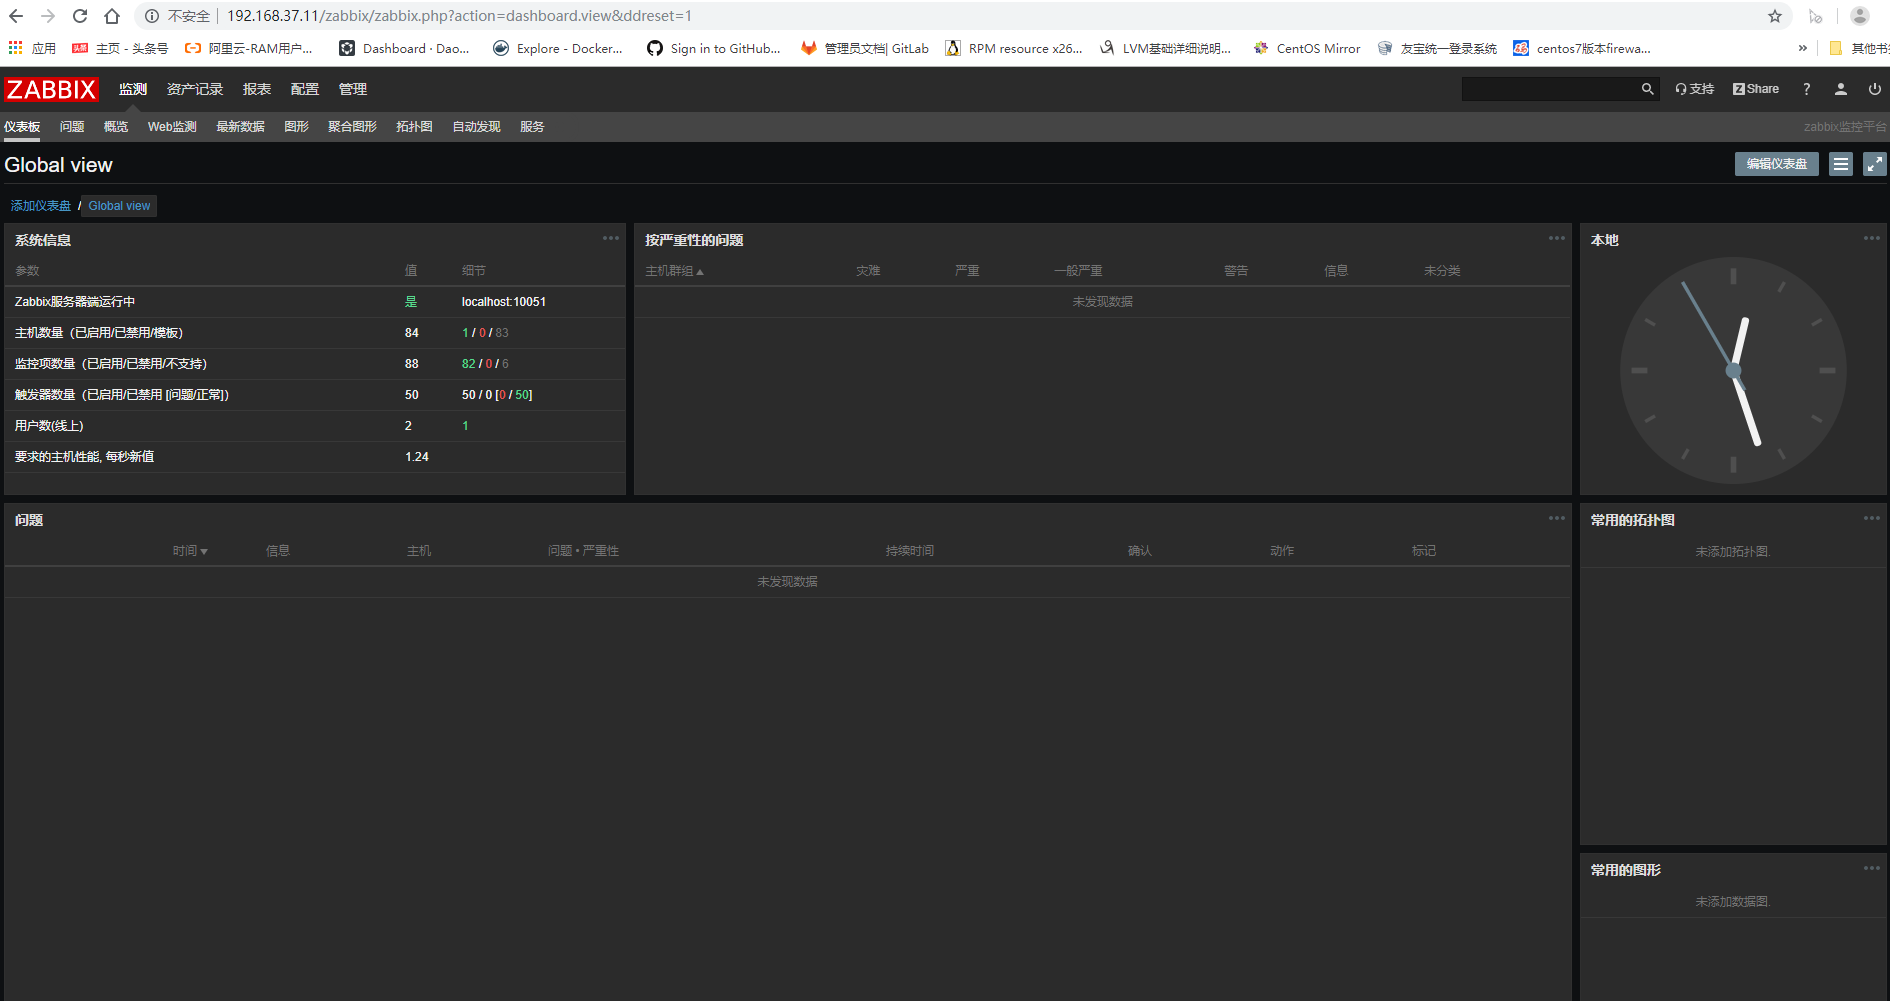
安装 Agent
在被监控的服务器上安装agent
liunx上安装:
rpm -ivh http://repo.zabbix.com/zabbix/4.0/rhel/7/x86_64/zabbix-release-4.0-1.el7.noarch.rpm
yum install zabbix-agent -y
[root@test13 ~]#vim /etc/zabbix/zabbix_agentd.conf
Server=192.168.37.11             #填写zabbix server的ip地址
ServerActive=192.168.37.11       #填写zabbix server的ip地址
Hostname=test13                  #填写本机的主机名

systemctl start zabbix-agent     #启动agent
windowns上安装:
- 下载安装包:https://www.zabbix.com/downloads/4.0.11/zabbix_agents-4.0.11-win-i386-openssl.zip
- 解压安装包到指定位置,例如D盘,安装包解压出来有两个文件夹,conf和bin;
- 找到conf下的配置文件 zabbix_agentd.win.conf ,修改LogFile、Server、ServerActive 、Hostname这几个参数。具体配置如下:
LogFile=E:\zabbix\zabbix_agentd.log #zabbix agentd的日志文件位置,可自定义 Server=192.168.37.11 ServerActive=192.168.37.11 Hostname=Windows_A - 安装agent(cmd管理员权限):D:\zabbix\bin\zabbix_agentd.exe -i -c D:\zabbix\conf\zabbix_agentd.conf
- 启动agent客户端:D:\zabbix\bin\zabbix_agentd.exe -c D:\zabbix\conf\zabbix_agentd.conf -s
源码安装zabbix
请参考:https://www.zabbix.com/documentation/4.0/zh/manual/installation/install
